Stella Toon 7
Now, it's time to start the animation work. Animating a mesh with BLENDER it's simple ( and hard, at the same time, to get the desired result) because there's not much functions, or controllers, or scripts or whatever, available.
So, the main method is...imagination and trial and error.
Split your 3D window in three our four parts ( if not done yet). Choose an Action window, an Ipo window and maybe a NLA one ( I've not used it for this tutorial).
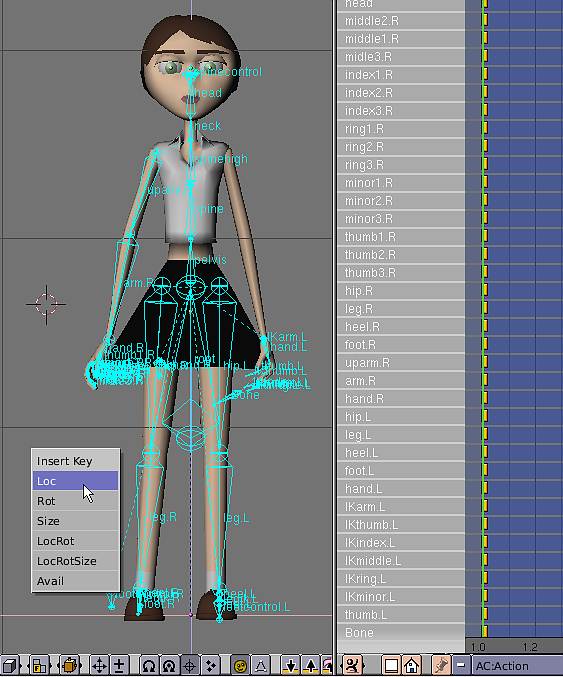
Select the character's armature, in the Action window press the little white square, add a new Action, then, with the cursor in the 3D window enter Pose mode, select all the bones, A key, press I key and choose "LocRot" in the "Insert Key" menu.
This will be the "starting pose" ( it's always good, to keep a basic position, so add a new Action to continue to work).
Let's do a basic movement like the one in the image above, to get used to BLENDER animation basics.
Please, ALWAYS remember this: verify the number of the actual frame before inserting keys and insert keys after you've made a movement before changing the frame number location.
BLENDER can insert automatically the keys for you when you move the bones! To enable this, in the User Preferences window, in the "Edit Methods" item, press the "Action" and the "Object" buttons.
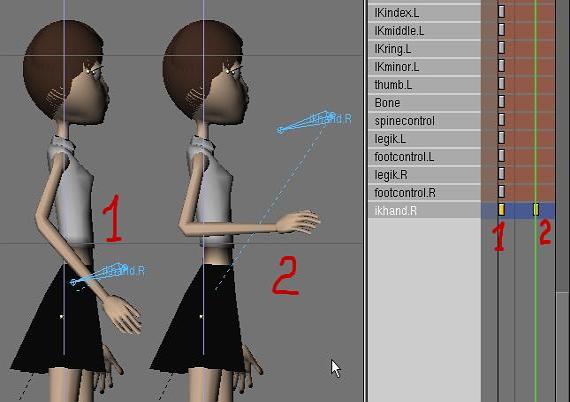
Select the "null" bone that controls the arm ( you can hide the other bones as I did in the image above, in Edit mode, in the Edit window, Select all bones, and press the "Hide" button in the list for the desired ones), with RMB over it in the 3D window or over his chanel/strip in the Action window, and, insert a Loc Rot keys ( if not done yet, 1) in frame 1 for ex.
Then, change the frame number location ( you can use the arrow keys: Up +10 frames, Down -10, Left -1, Right +1), ex: frame 11, move the null bone in Side view to the desired location and insert another Loc Rot keys ( 2).
To watch your work, press repeatidilly the Left and/or Right arrow keys, or LMC and over the green line and grab it to the right or left
or do Ctrl-A in the 3D window, but, before, you must set the "Sta:" and "End:" values in the Display window.
Here I'll talk about a little detail that can became very annoying with complex animations.
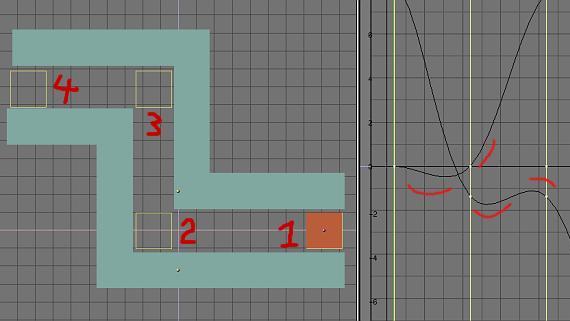
Look at the image above. The goal is to move the orange square along the track, without touching the green walls.
Quite easy, it's true. We'll place a Loc key the beggining of the track, at frame 1 for ex. ( 1), move the square only in the horizontal axis for the left side, add one Loc key ( 2) at frame 11, move the square to the top, add another Loc key in frame 21 ( 3) and finally move the square and insert one Loc key at frame 31 ( 4).
Play the animation! Ahhhh!
The orange square is...drunk?! It moves with a "round fashion".
The answer to this state is in the image above at right side. When BLENDER creates keys automatically interpolates the Ipo curve
between the different key locations to give a general smoothness to the movement.
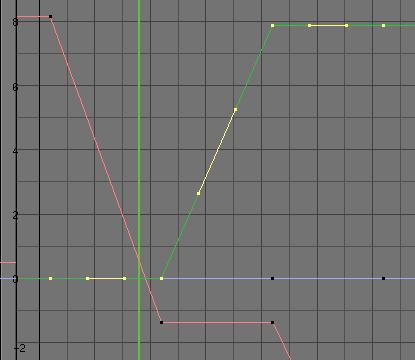
To solve this problem, in the Ipo window, Select all the Ipo curves, A key, enter Edit mode, Tab key, Select all the contol points, A key again, and then press the V key to change the bezier control handles as in the image above.


Above, there's a little animation showing the Before and After state.
Well, much more could be said about animation methods ( and constraints), but, i guess that's more a matter of experience. Practice a lot.
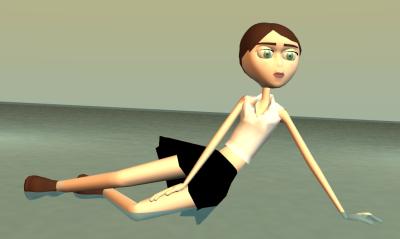
Armatures are great to still pictures too ( it'll be very difficult to model the character in a pose like the image above. An dyou can change the pose quite easily).