Little OTO 6
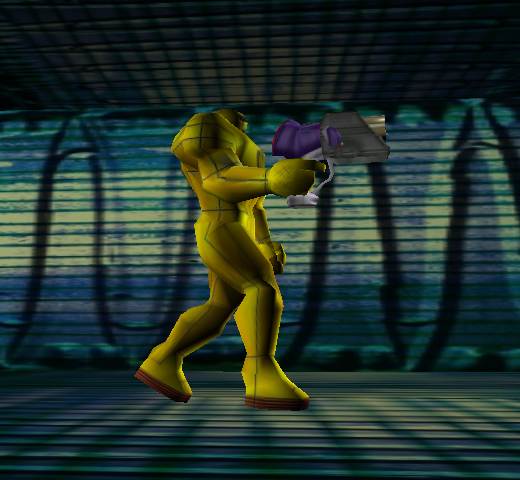
Still there!? Uh!!
Well, now it will be fun, eh eh!
We'll make our proud warrior obey to our "orders", in other words, "How to control our player character"!?
As you have noticed ( i hope) in most games, the "player" character "perform" an action when you press a keyboard key ( or mouse click). Often there's many actions available.
I'll only explain the most basic one: the walking cycle. This way you'll learn the basics and easily
( he he) make the others. Let's start.
Divide your 3D window in at least 3 windows, one being an Action window, other an IPO edit one.
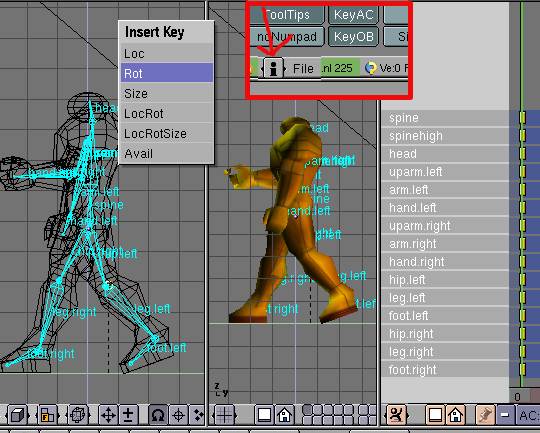
In the User preferences window, at top bar, enable the "KeyAC" button (red square in the image above), this way, BLENDER will add position keys automatically.
In the 3D window select the Armature and enter Pose mode . In the Action window press the little square button to add a new Action.
Now check if you're in frame 1 and place the model members in the biggest amplitude walking position ( one very useful advice: when rotating a bone, keep Ctrl key pressed down, this way the rotation moves by steps of 5º degrees. Later, you'll be very grateful to me). When done select all the bones, A key, press I key to bring the Insert Key menu and choose Rot from the menu items. Notice that in the Action window, bone's channels and keys have appeared ( you must press the "house" button maybe, to see them).
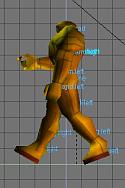
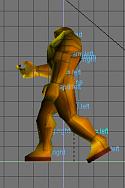


In the images above i show you the basic four steps of a walk cycle (from now on, you don't need anymore to insert keys manually. Each time you move a bone, BLENDER will do it automatically).
Image 1-Frame 1
Image 2-Frame 5
Image 3-Frame 9
Image 4-Frame 12
Frame 16- The same as frame 1 but mirrored. To do this return to Frame 1 press the down arrow button (1), back to Frame 16 and press the pink arrow button (3). Do the same for the other poses in Frames 20, 24, 28. Frame 32 is exactly the same pose as Frame 1. So go back to Frame 1, press down arrow button (1) and in Frame 32 press the up arrow button (2).
You can achieve the same result in the Action window; select all the keys in the Frame1, do Shift-D and G to move them to the Frame 32 (keep Ctrl key pressed down, to snap to 1 frame steps moving).

Now that we've a little Action, we can start to make a "great" game. In four steps!
1- Select the Armature. In Realtime buttons enable the Actor and Dynamic buttons. Set
Size: in a way that the pink dot sphere covers the Mesh ( that sphere is the collision
area).
2-In the Logic Brick buttons add a "Keyboard Sensor", and in the "Key" field choose one key
that will make the character moves forward!
3-Link the "Keyboard" sensor to a newly added "AND" Controller.
4-Link the "AND" Controller to a new "Motion" Actuator and a new "Action" Actuator with in
his "AC:" field the exact name of the walking cycle action we've made before, and in the
"Sta:" and "End:" fields, the lenght of the walk cycle animation.

Before we can try our fresh keyboard control, we must add a scene to our game.
Add a Cube, enter Face Select mode, F key, load a texture ( or more) to "paint" the walls, ground and ceilling of the room. By default the normals of new objects point to the outside. But our "game scene" it's "inside" the cube.
So, press Tab key, select all the vertices and press Ctrl-Alt-N keys to make face normals point inside. Tab again to return to Face Select mode and in front view, select the front and back walls, U key and choose From Window in the menu. In the Image window scale the faces like in the red square insert above (the image texture will repeat in the X axis of the walls). Repeat this for the other walls, and texture the ground and ceilling according to your taste.

Just some more few things before the great moment. We need a camera to make "our" view.
Add a Camera to the scene, place it more or less behind Little OTO, pointing to him, and add a "Always" Logick Brick Sensor, linked to an "AND" Controller and linked to a "Camera" Actuator with in the "OB:" field the exact name of the Little OTO object. The other settings control the distance to the followed object and the height of the camera view.
Ok, it's the great moment.
Switch to Camera view, 0 key, press the little Pacman button ( image above) in the icons bar (or P key) and........it's magic ( i hope, for you, me, I'm tired, i need to take a rest) .
Bye!