Little OTO 5
So, after the Skinning part, you're still there?! Good! You're strong! We'll see after this "easy" one section, the animations!
But before, some philosophycal considerations. You'll not make (and me too) a "commercial quality game" (like those we see in game magazines) with BLENDER. I know it's sad!! So all those techniques i'm using, have the goal of making "little things quite nice" and FAST. There are better ways of doing all this (specially animations), it's up to you to try them.
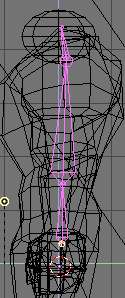

Let's start. To anime a mesh we need an Armature. Snap your cursor to the center of the mesh. In side view, Add-Armature, with three bones ( image 1). In front view place the cursor like in the image above ( image 2).
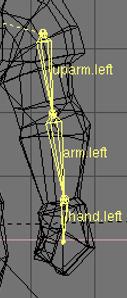
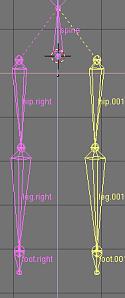
Always in Edit mode Add-Armature with three bones ( image 3). Do the same to make one leg. To do the other, just select all leg bones, copy and mirror them ( image 4). Do the same actions to make the arm.
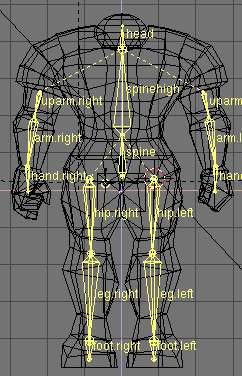
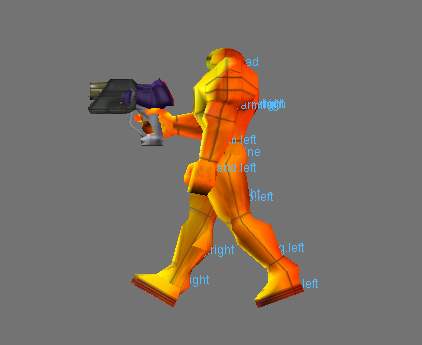
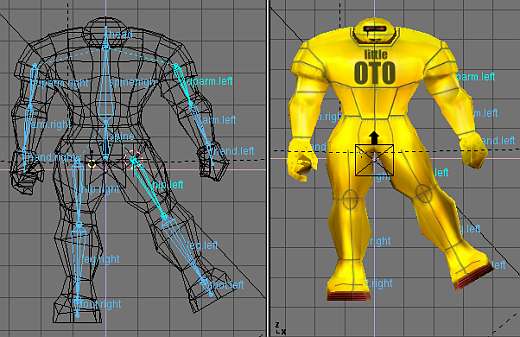
Here's the complete Armature setup. After you've finnished the bones creation, you must name them (very important). Select the Armature, enter Edit mode , select all the bones , and in the Edit buttons, enable the blue Draw Names button. Click in the light gray boxs to change the default names.
Follow the standard rule for symetric bones, use the .left and .right after the name, this way you can use some usefull functions later.
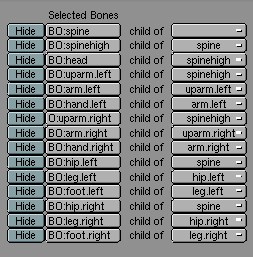
In the light gray boxs you must link the different bones ( BLENDER have almost done the work, anyway) to a "special" bone, the "root" one, the parent (spine in the image, the link box remains empty, use the image below as a guide).
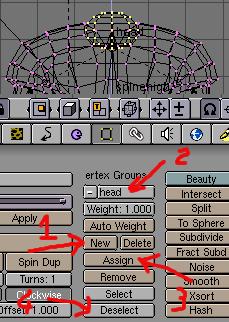
OK, take a deep breath, we must assign all the vertices to the Armature's bones.
Select the mesh, enter Edit mode, select the head verts and in the Edit buttons act like this:
1-Make a New group
2-Name it exactly like the corresponding bone
3-Now press the Assign button
4- Deselect...or not, you can hide the vertices selection in the 3D window to help your work.
To get "clean" animations, each vertice must be assigned to one bone only!
Again, be careful!
Repeat these steps for all the mesh vertices. Nice mesh deformations needs good assign choices. Take your time, it's a long and fastidious task.
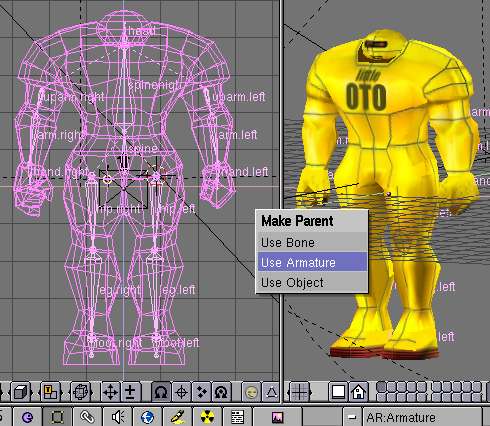
To parent the Mesh to the Armature, first select the Mesh, than the Armature do Ctrl-P, and choose Use Armature in the Make Parent menu.
Now you'll have another nice moment (i hope). Select the Armature and do Ctrl-Tab keys to enter Pose mode. Select one of the bones (ex: the leg) and rotate it, the Mesh will follow, and it's a...joy!!
Check all the bones, if some vertices stay in place, return to the Assign task and add the remaining vertices to the bone's group.