Little OTO 3
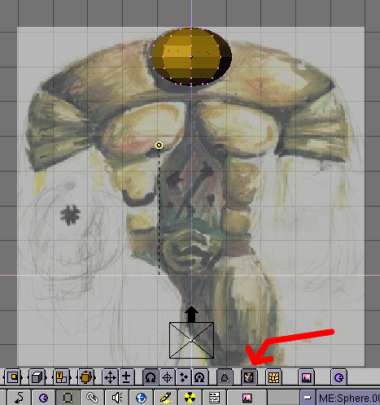
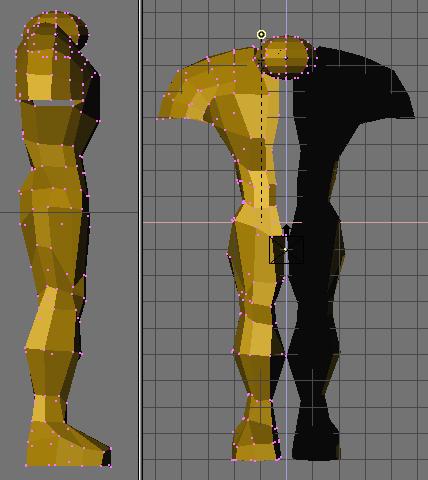
Start BLENDER and delete the default plane. With the 3d cursor centered, in Top View do Tab, ADD-Mesh-UVsphere with Segments: 8 and Rings: 8. This it'll be the head!
If the background image trouble your work you can disable it with the little image icon button in the Buttons Bar (red arrow)
With the sphere still selected scale it down a bit in the Z axis.

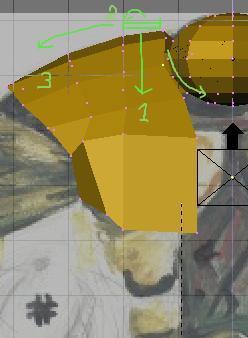
Select the first sphere, enter Edit mode, and in Top view, add a Plane at the left side of the sphere (right side of the body, green square) and act this way:
1- Select the two front vertexs and extrude them down 5 times in Side view, to make the top front of the body.
2- Select the two back vertexs of the original Plane and Extrude down 3 times in Side view, to make the back of the body.
3- Now in Top view, select all the left row of the planes to make the shoulders and top and back torso (see the pictures).
. Now we'll use an useful technique; we only need to model half of Little OTO, BLENDER will do the other one automattically.
Do an instance copy of the head sphere and without moving the mouse press S key, and then, X, to mirror the sphere. Select the new sphere, enter Edit mode, select all the vertexs and delete them (we don't need two heads). In my BLENDER the mirrored halve is black, and i can't change it??!!
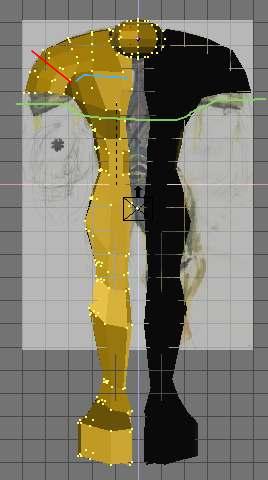
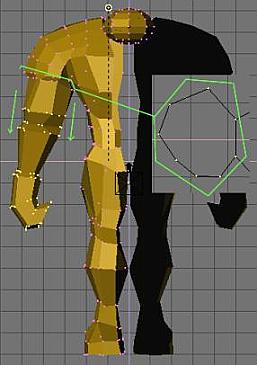
To continue the modelling of the torso, select the entire row of the shoulder's end (red line) Extrude, and Rotate. After this, select the "blue line" vertexs and extrude down.
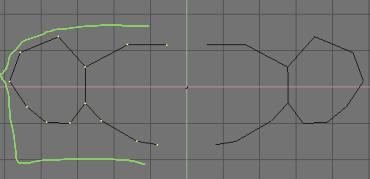
Here's an important step! You must reshape, refine and build some faces. In the image above you've a top view "cut" of the chest area (green line in the image above and the previous one). These edges and faces must be "clean" before the next steps. Be careful!
When done, select the torso's half-circle points and Extrude, Move, Scale and reshape them more or less 12 times (use the backgroun image as a guide) to make all the body.
With BLENDER is quite easy to make the basic shape of a character. The hard part is to refine all the vertices (image at right).
As you can see in the image, you must try to keep the rows of vertices more or less alligned (once again if you're a bit lost, save one image of the tutorial and load it as a background guide).
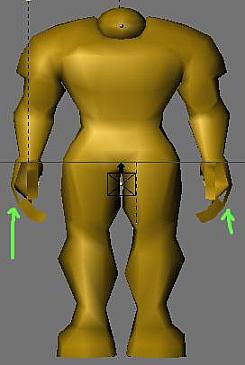
To model the arm we'll use the same method as the leg. Select the last row of vertices on the body top (see green insert) and extrude down 5 or 6 times to the wrist.
Extrude again to make the hand.
The hand needs special attention. You must decide, if you model the hand like a block, or with individual fingers. Here i've modelled two fingers out of the hand block. Later, when the model will be close, the left hand needs to be remodelled (or maybe not). To close the model select one halve then the other ( Shift-Right-mouse click) and do Ctrl-J. Now build faces one by one to fill the middle area.
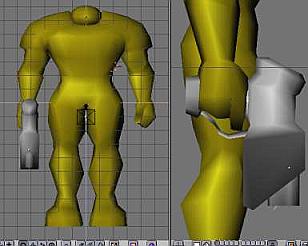
If you've your weappons already modelled, bring one to the scene, this way you can adjust the hand position and shape. To parent the weapon to the model, select the weapon then select the Armature
( when you have one) do Ctrl-P and choose Use Armature in the pop-up menu. You must make a group with the same exact name of the hand group, for the weapon, and assign all his vertices.
Finally LittleOTO is finished.
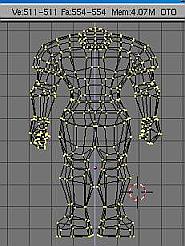
Enter Edit mode and check in the top bar the model statistics: 511 Vertices and 554 Faces.
Not bad! Note, that if you'll use BLENDER's models with other game engines, that BLENDER ( and me) works mainly with 4 vertices faces. When exporting ( to 3ds for ex.), the faces will be triangulated, so LittleOTO will have more or less 1100 faces.
Quite low count, by today standards.