Iron Woman 7

Now that our half-character is finished, it's time to close the object. Select the two halves and do Ctrl-J to join the meshes. Enter Edit mode, Select three or four vertices at a time and build faces to close the model.


Make some renderings with diferents points of view, to check if your object don't have disgracious zones.

It's time to start to apply the textures.
Here I'll use a more or less basic and fast method of skinning work.
If you want to try a more sophisticated one, please, read the Little OTO tutorial.
Give the object a light color ( in the Material Buttons) that will contrast with the pink vertices, enter Edit mode, and in Front view press the little landscape button ( see image above) at the Buttons Bar. This will render the actual 3D view.

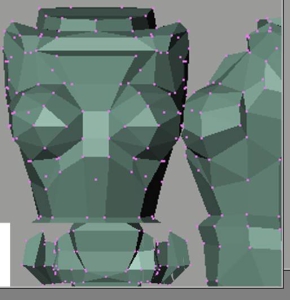
Save the image in 1024x768 as TGA format ( you set this in the Display buttons window). Repeat this action to the Side, Top and Back views of the character. When changing the view window don´t touch at the zoom level, this way the vertices of the different views will be alligned. We'll use these images as texture work guides.
Start your favorite 2D paint program ( The GIMP of course, if you need some help with him, read the GIMP tutorial) and open a new image, with at least 1024x1024 size ( the power of 32 is important).
We'll start with the torso.
Open the Front view TGA image, you've rendered before, select the torso area and move it over the new image ( layers are very useful here, so, keep as many as your Ram handles). Scale up or down the torso image ( if necessary) to fit the texture image size. Repeat those operations with the rendered top and side views.
You must enter the different parts of the character body, in the 1024x1024 texture without overlapping.

Go back to Blender, give a shiny material to the character, and render an 1024 Height size image of the Front, Back and Side views.
Save the images in TGA format.
We'll use those images as the basic texture material.

Well, at this state I can't help much. You must have some drawing and painting skills and some knowledge of 2D painting software.
Some techniques i've used:
Open the shiny rendered image, select the torso area and bring it to the texture image we've made previously . Scale it to fit the torso vertices ( make the image translucent, this way it's more easily to adjust it).

In a new layer, draw ( or copy and paste) some symbols or technical metal pieces or...whatever, over the shiny torso. The map and bump filters are very useful.

To apply the textures put two adjacent windows in your working space, one 3D view, the other an UV Texture window.
Press F key to enter Face Select mode and U key to get the special UV calculation menu.
We'll use almost the "From Window" item.

In 3D window, enter Face Select mode. Select the faces that fit your needs, and choose "From window" in the U key pop-up menu.
The faces will appear in the image window.
Load the texture ( in image window) that you've made with the 2D paint program, and move the faces over the texture ( surely you must scale the faces to fit) to the desired place.
When you have a symmetrical axis select both "twin" faces and do U in a perpendicular view ( in this case, the side view), this way you'll apply the texture to both face selections at the same time.

Here ( image above) I've already aplied textures to the left leg. To do the same with the right leg, select the faces in 3D window, and choose "From window", in the UV Calculation menu.
The faces appear in image window as usual. But the texture "only have left leg" ( image above right). How can we do? Simply select all the faces, and do S-X to mirror them.
Almost all the 3D edit functions work in the UV Texture editor.
Well, now...repeat those steps for all the body parts!
Be brave!!